How to create a sales invoice in Xero
If you intend to use Xero invoicing feature for your business, just follow these steps to create a new sales invoice to send to your customer.
1 - Go to the invoice creation page
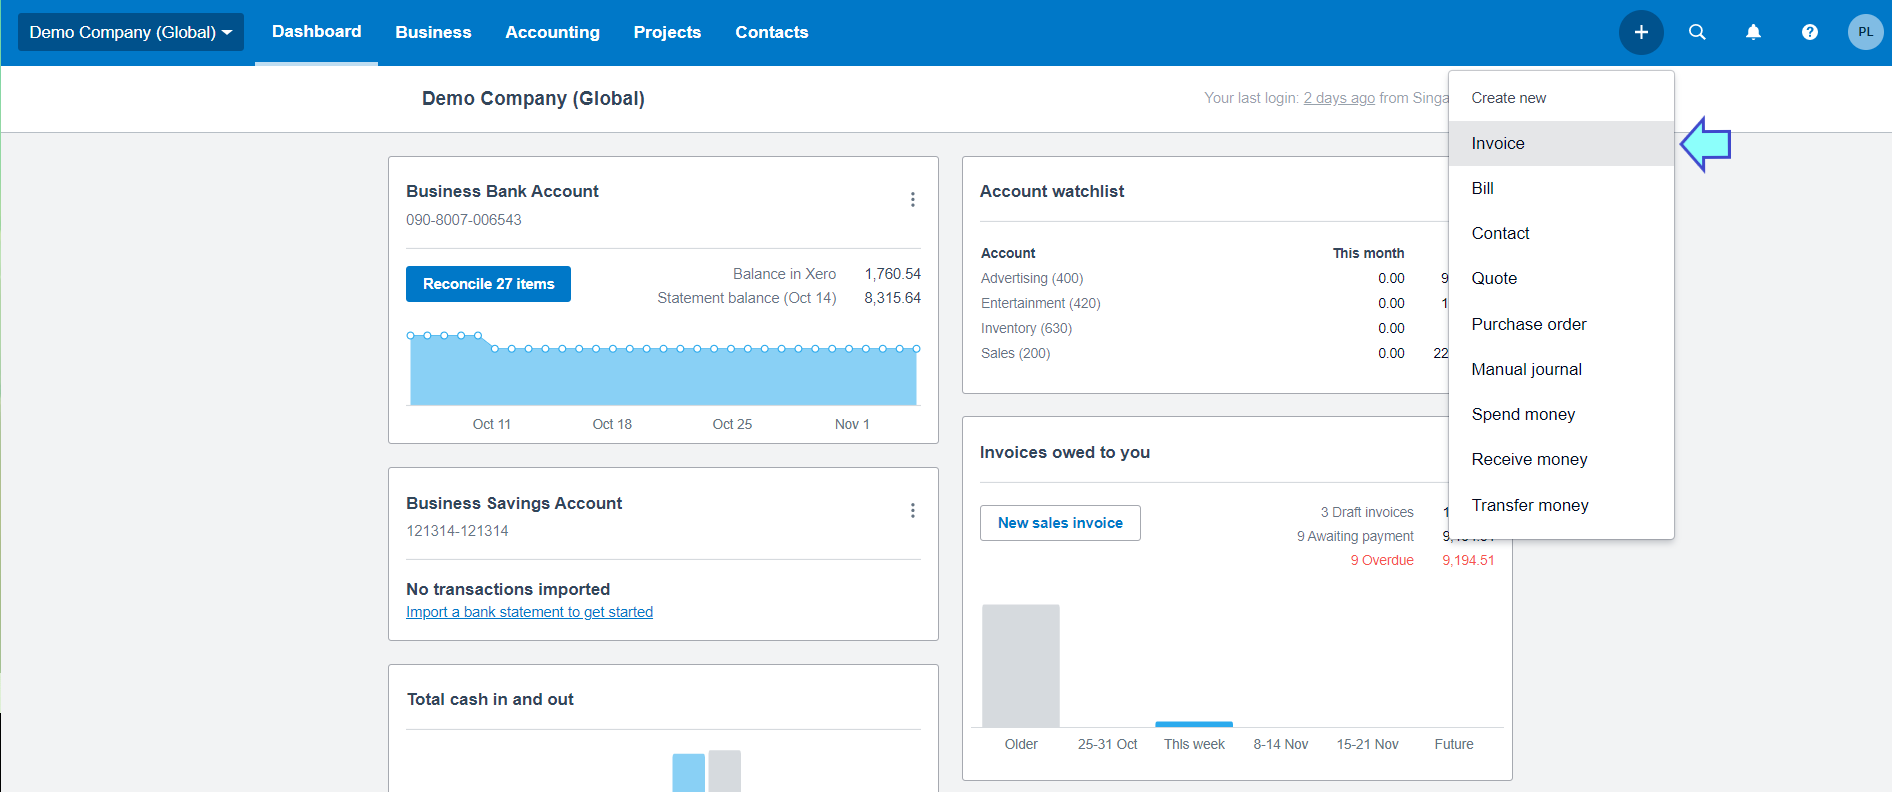
From your dashboard, you can access invoice creation screen in 3 ways:
- By clicking + on the top right of your screen, and then Invoice.
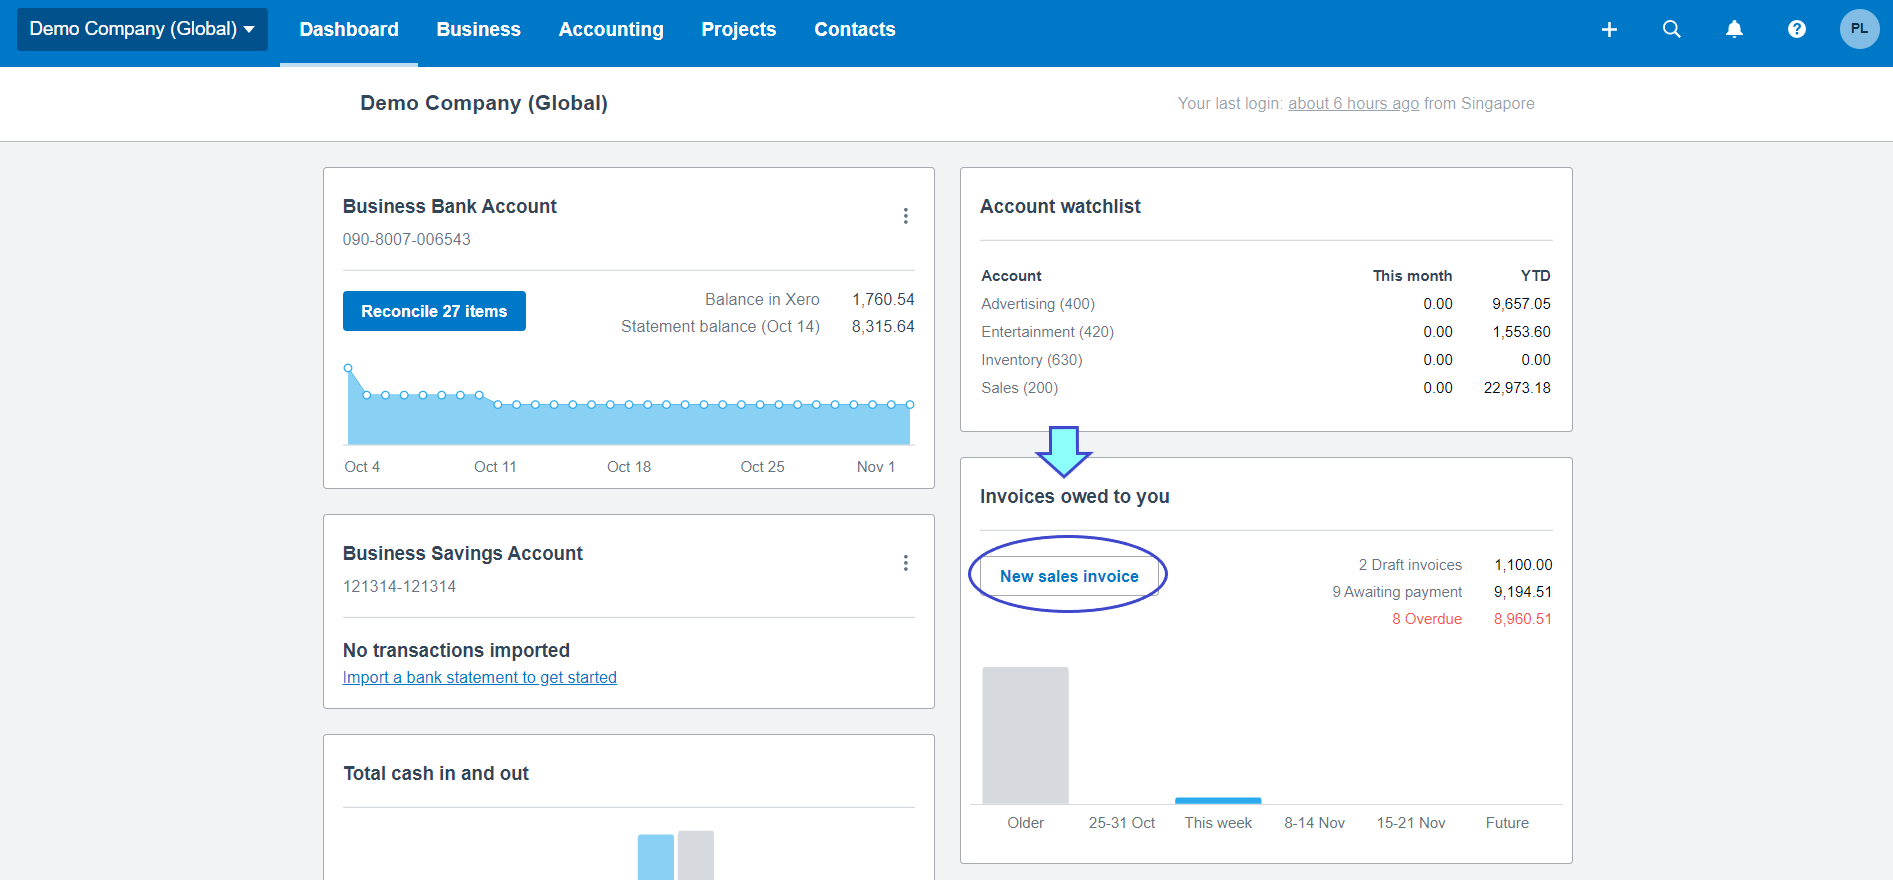
- By clicking New sales invoice button under Invoices owed to you, a box on your right-hand side.
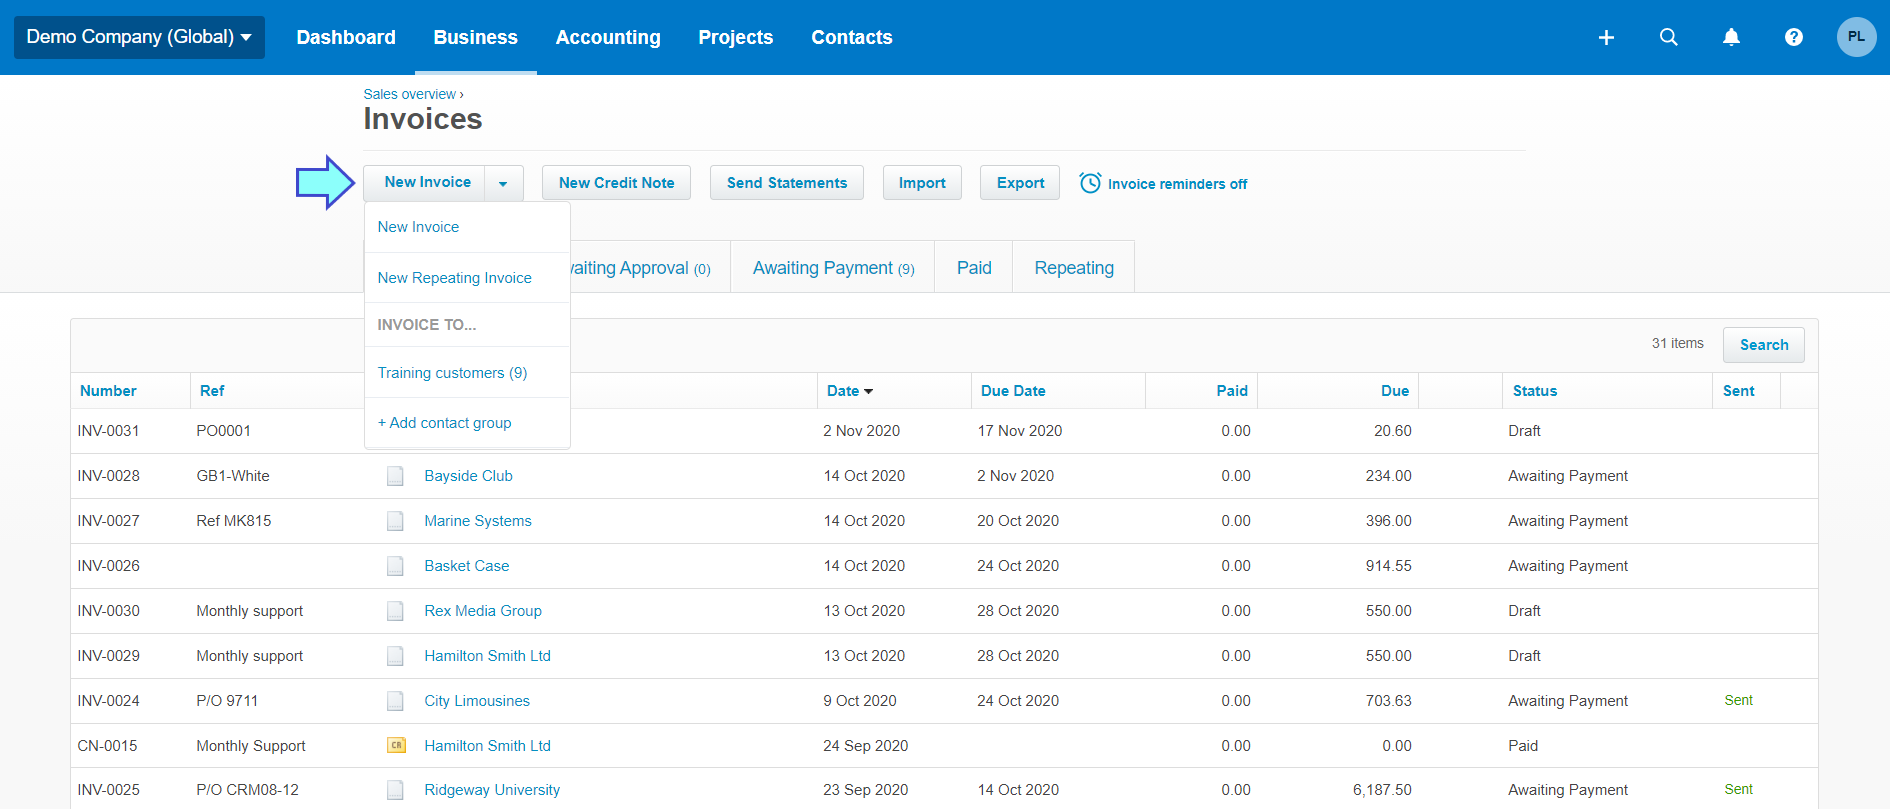
- By clicking Business at the top bar, then Invoices.
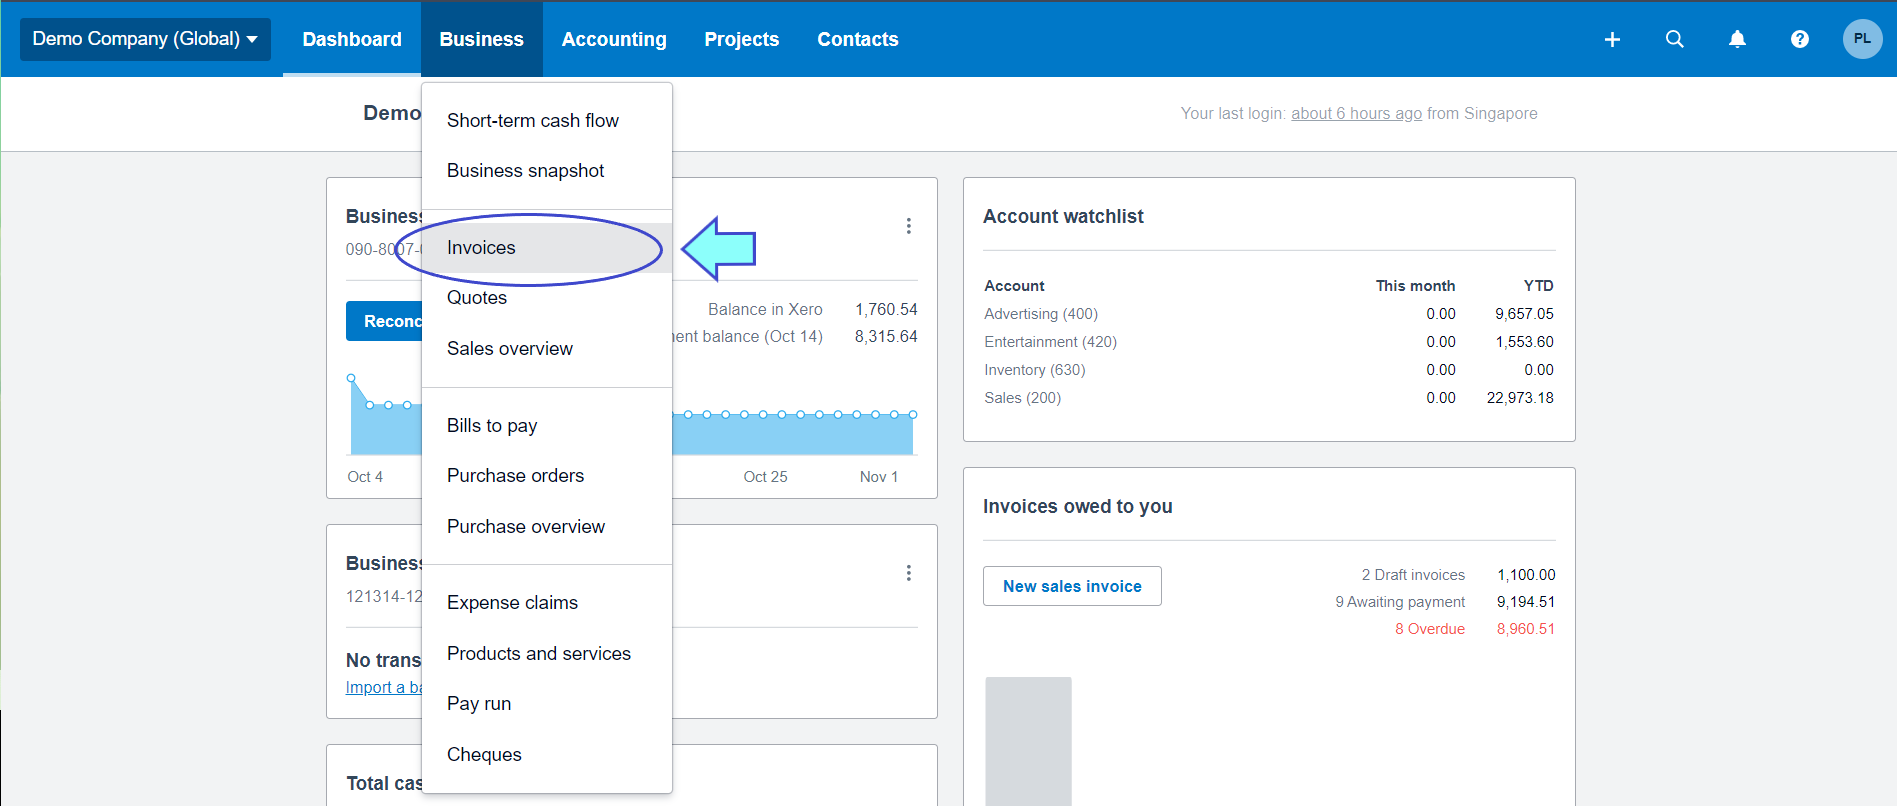
You will find New Invoices button there. There are two options for invoice creation:
- New Invoice for one-time sales or services
- New Repeating Invoice for recurring sales or services that you want to bill your customer on recurring basis e.g. monthly service fees.
2 - Create a new invoice
If you select to create a new invoice, below is the template you have to fill.
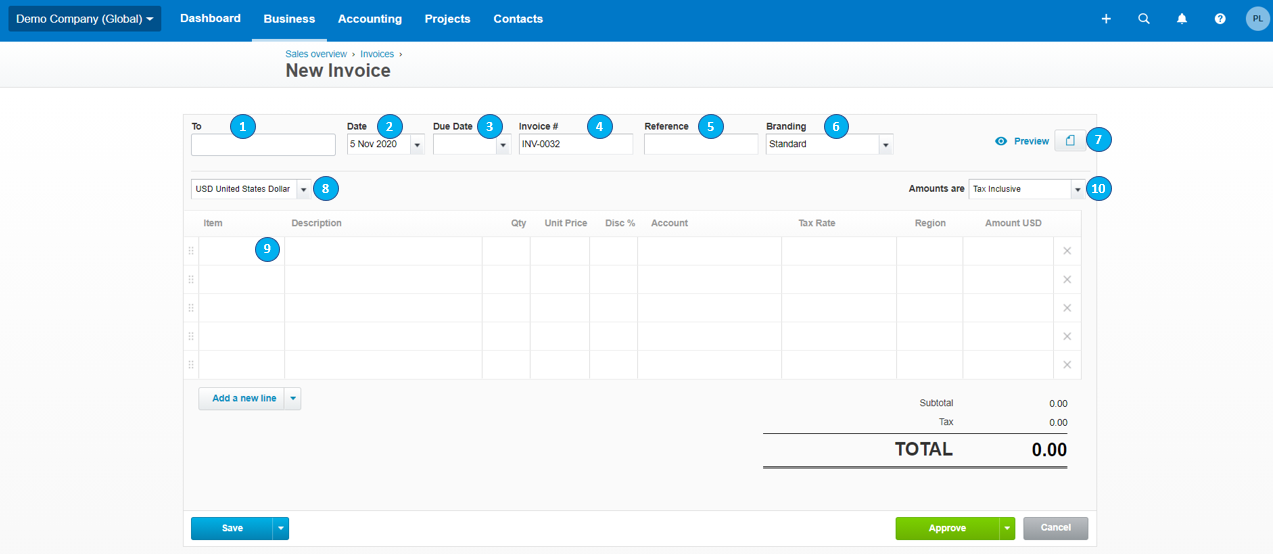
- To - Customer name
- Date - Invoice date. Xero automatically populates the current date, but you can backdate or postdate as you prefer.
- Due Date - Payment date give to your customer. You can type "+" followed by the number of days of your payment terms e.g. "+15", and Xero will populate the due date for 15 days after invoice date automatically.
- Invoice # - Invoice number. Xero automatically increments invoice number in sequence whenever you create new one. However, you can also manually change to any fomat you prefer.
- Reference - In case you want to refer this invoice to other document such as a purchase order.
- Branding - If you have your unique invoice template for your company, you can select it here. Otherwise, invoice will be created using Xero standard template.
- Attachment - For you to attach reference document along with the invoice
- Currency - The default currency is your functional currency. If your Xero is upgraded for multi-currency, you will be able to select different currency for your invoice.
- Items - Input your sale or service items, description, quantity and unit price. Then, Xero will prepopulate the summary amount of each item and the whole invoice.
If you have an inventory list, you can select your sale or service items from dropdown. Xero will retrieve the unit price from the inventory list.
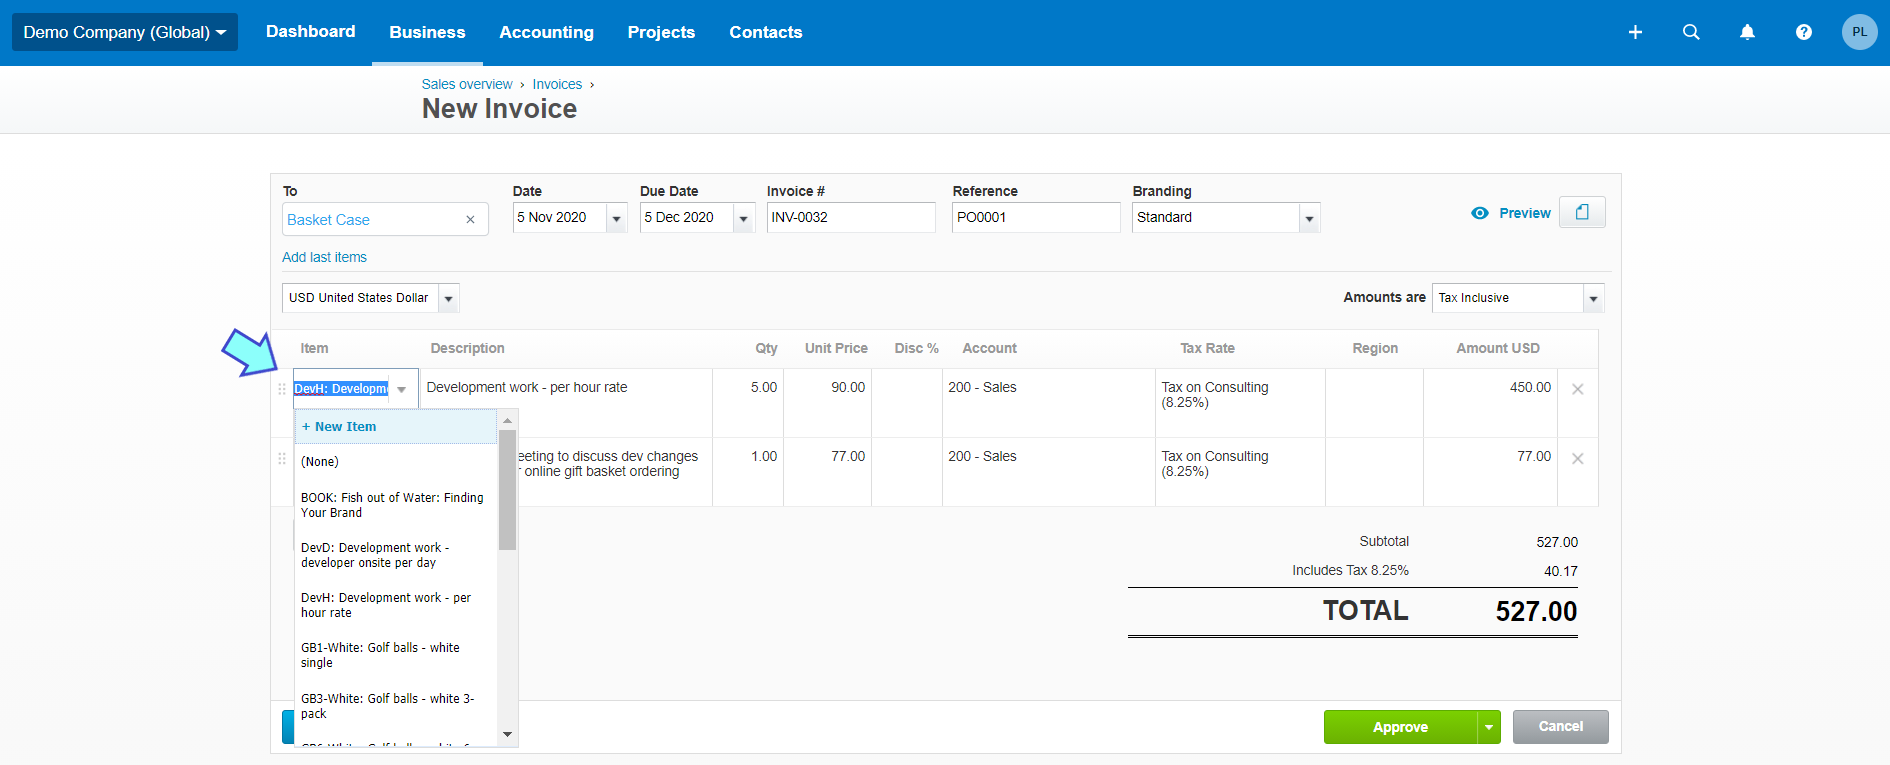
If you do not have inventory list, you can still input sale or service items manually in the invoice.
- Tax - You can select 3 ways of how GST incorporates in your invoice.
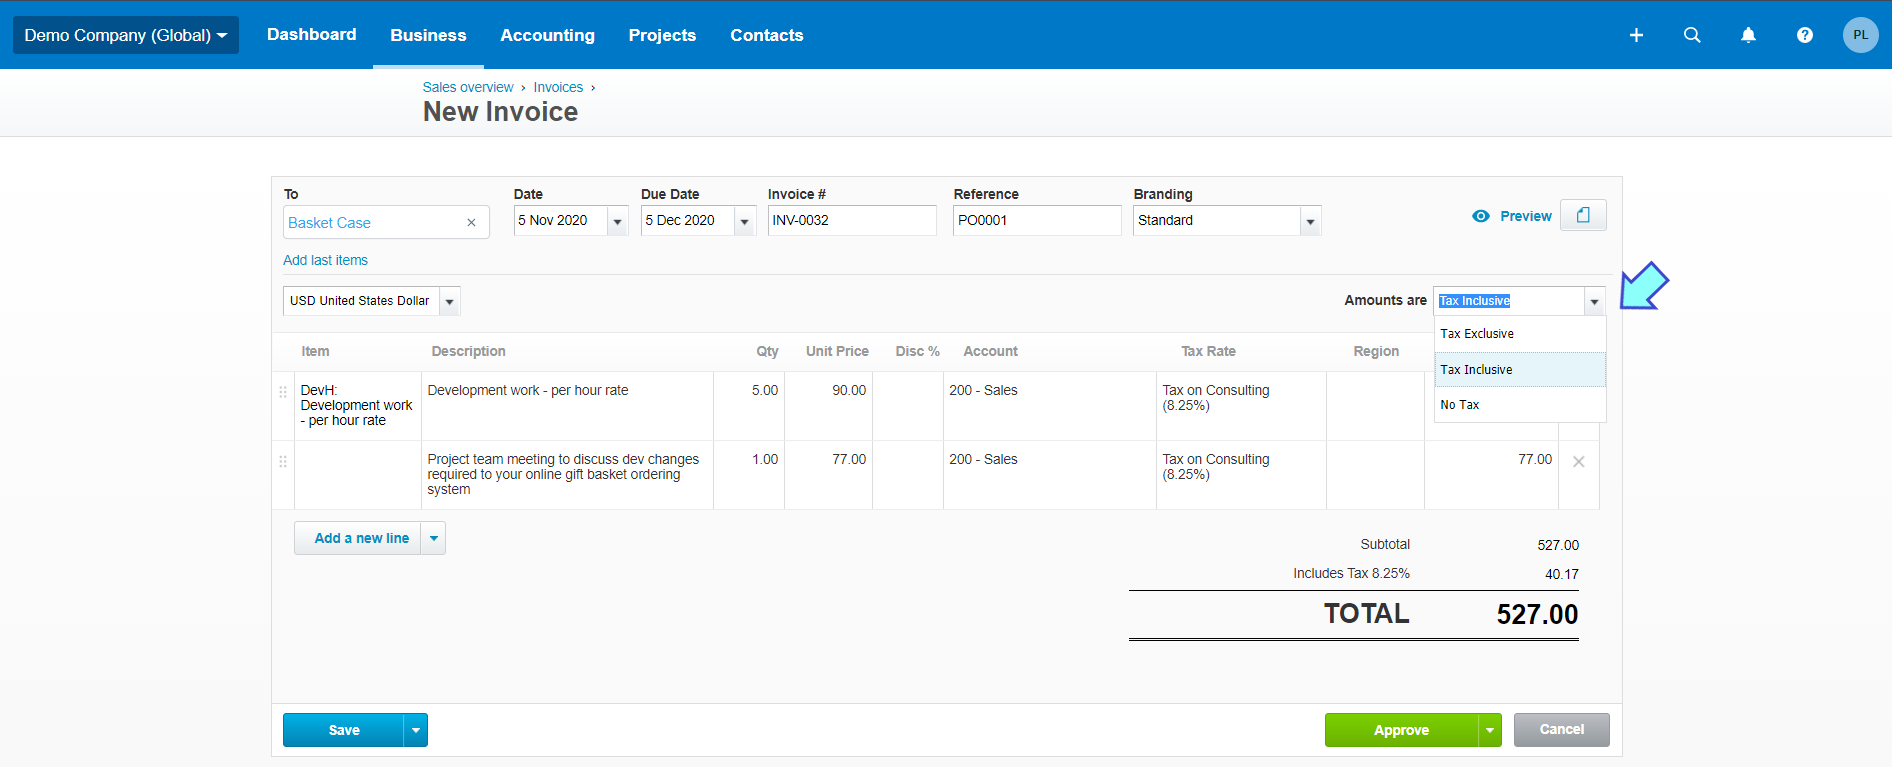
- For GST-registered companies:
- Tax exclusive - GST is not included in your unit price. This is the common practice for B2B companies.
- Tax inclusive - GST is included in your unit price. This method is the usual practice for B2C companies.
- For non-GST registered companies:
- No tax - No GST will be added to the invoice
Below is example of completed invoice template should look like:
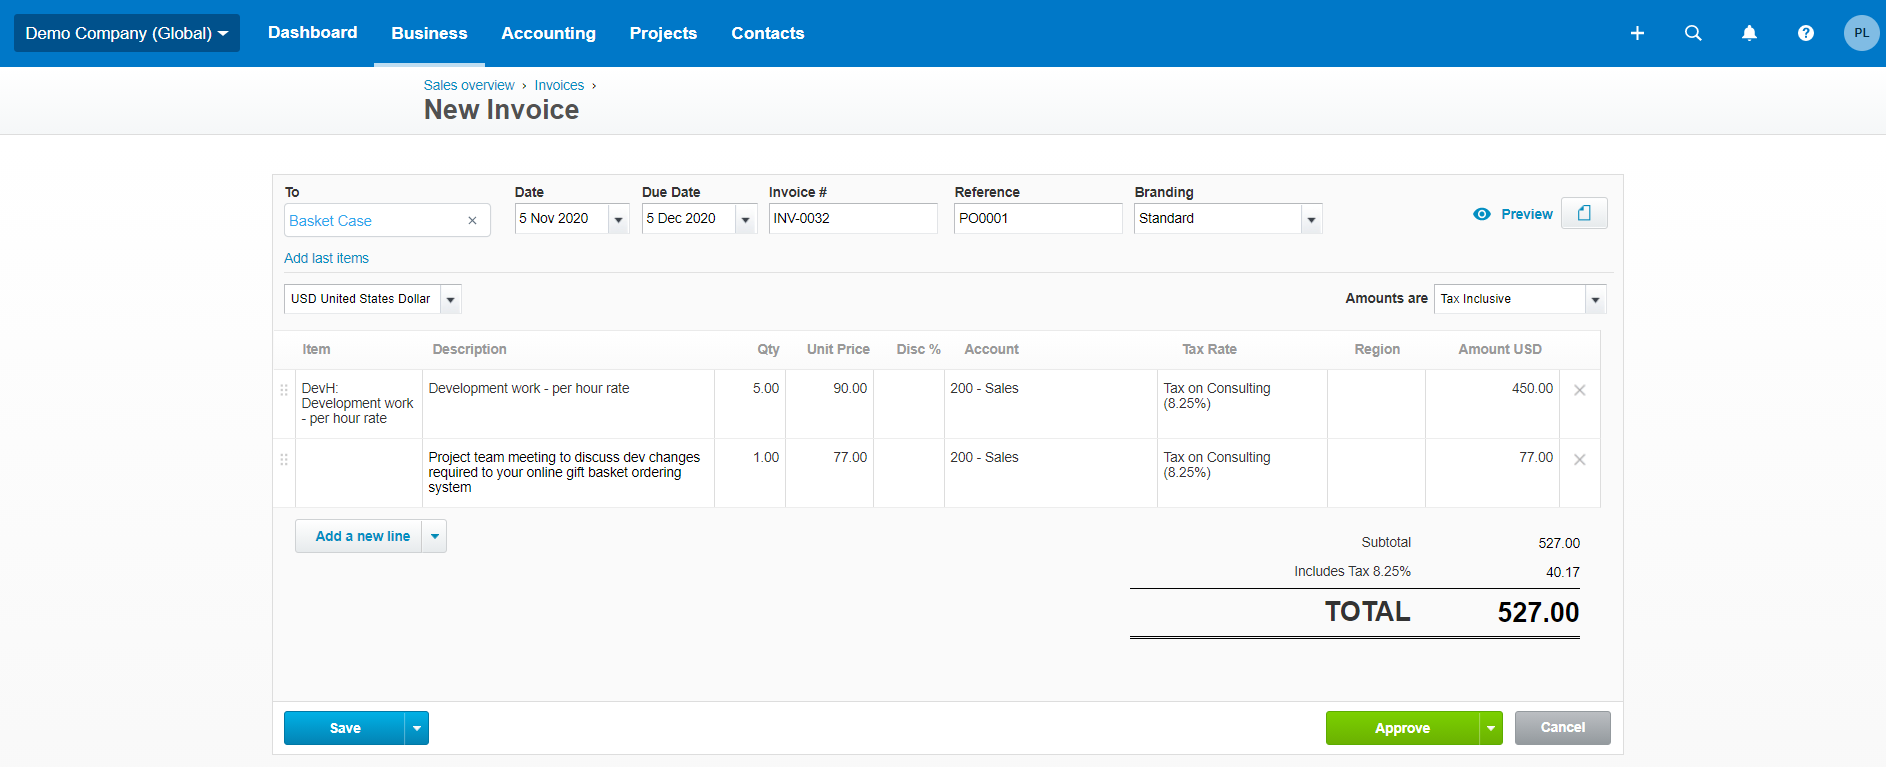
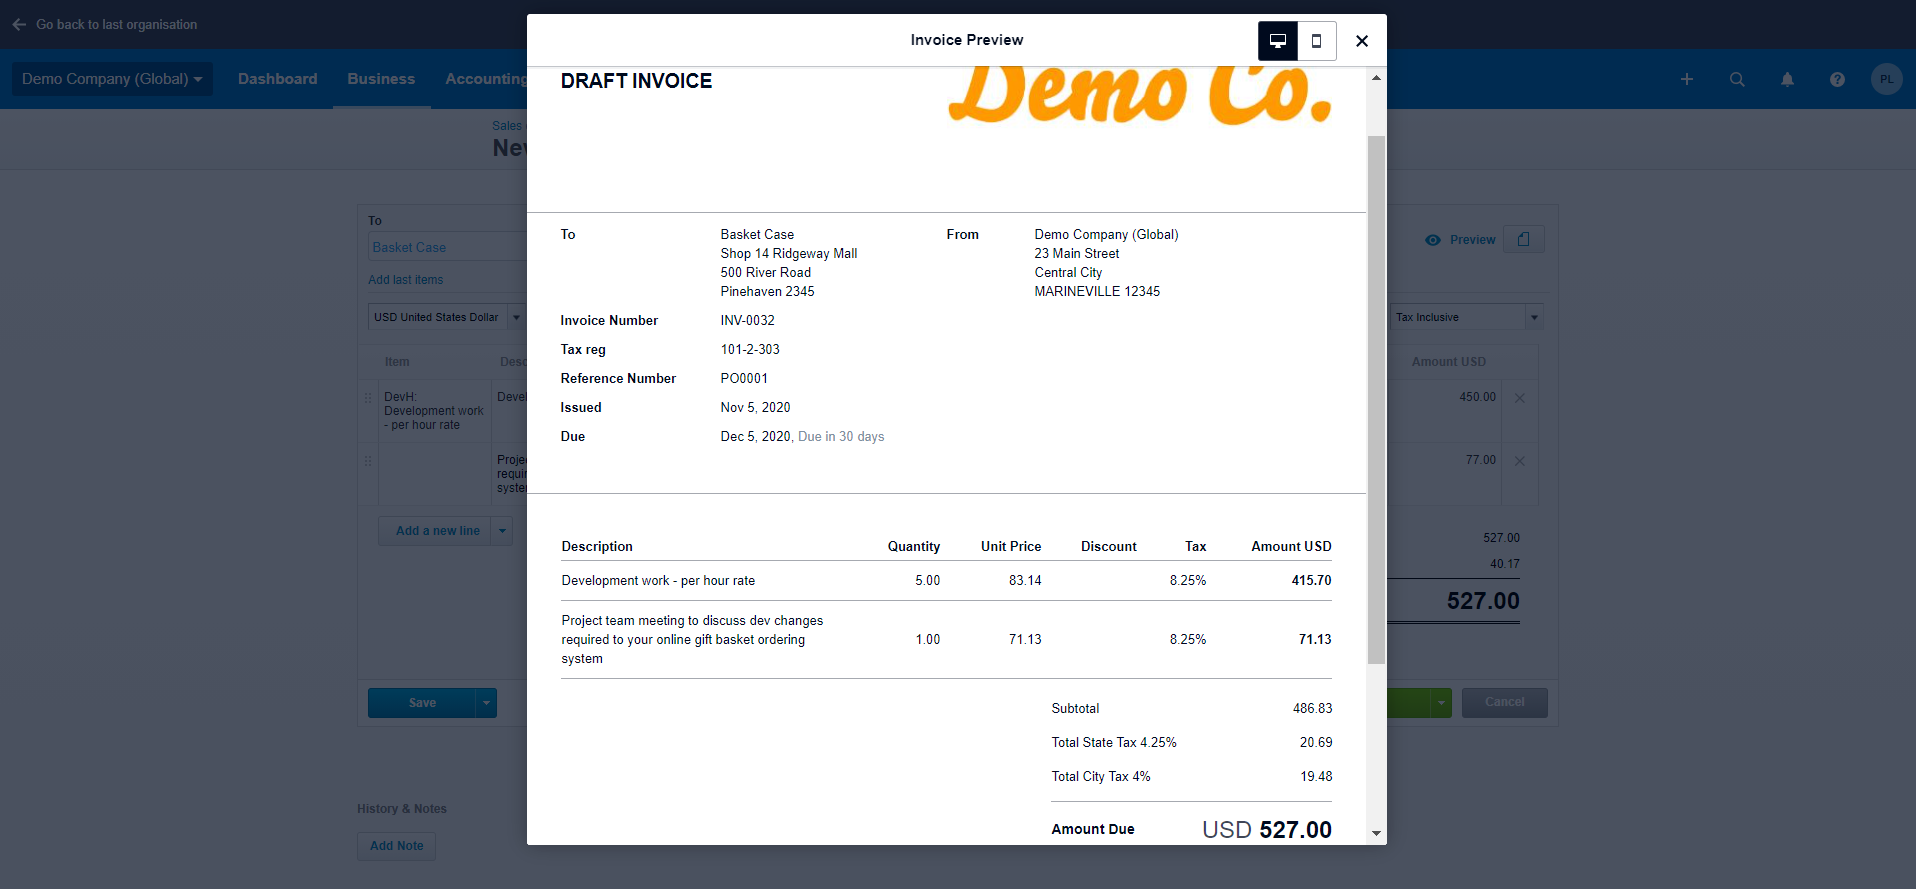
You can see how your invoice looks like by clicking on Preview, next to attachment button.
3 - Save/ Approve the invoice
Once everything is good, you can select either Save or Approve.
- If you are unsure about the details in your invoice or are planning finish it later, click Save to create a draft and you can come back to edit or delete later.
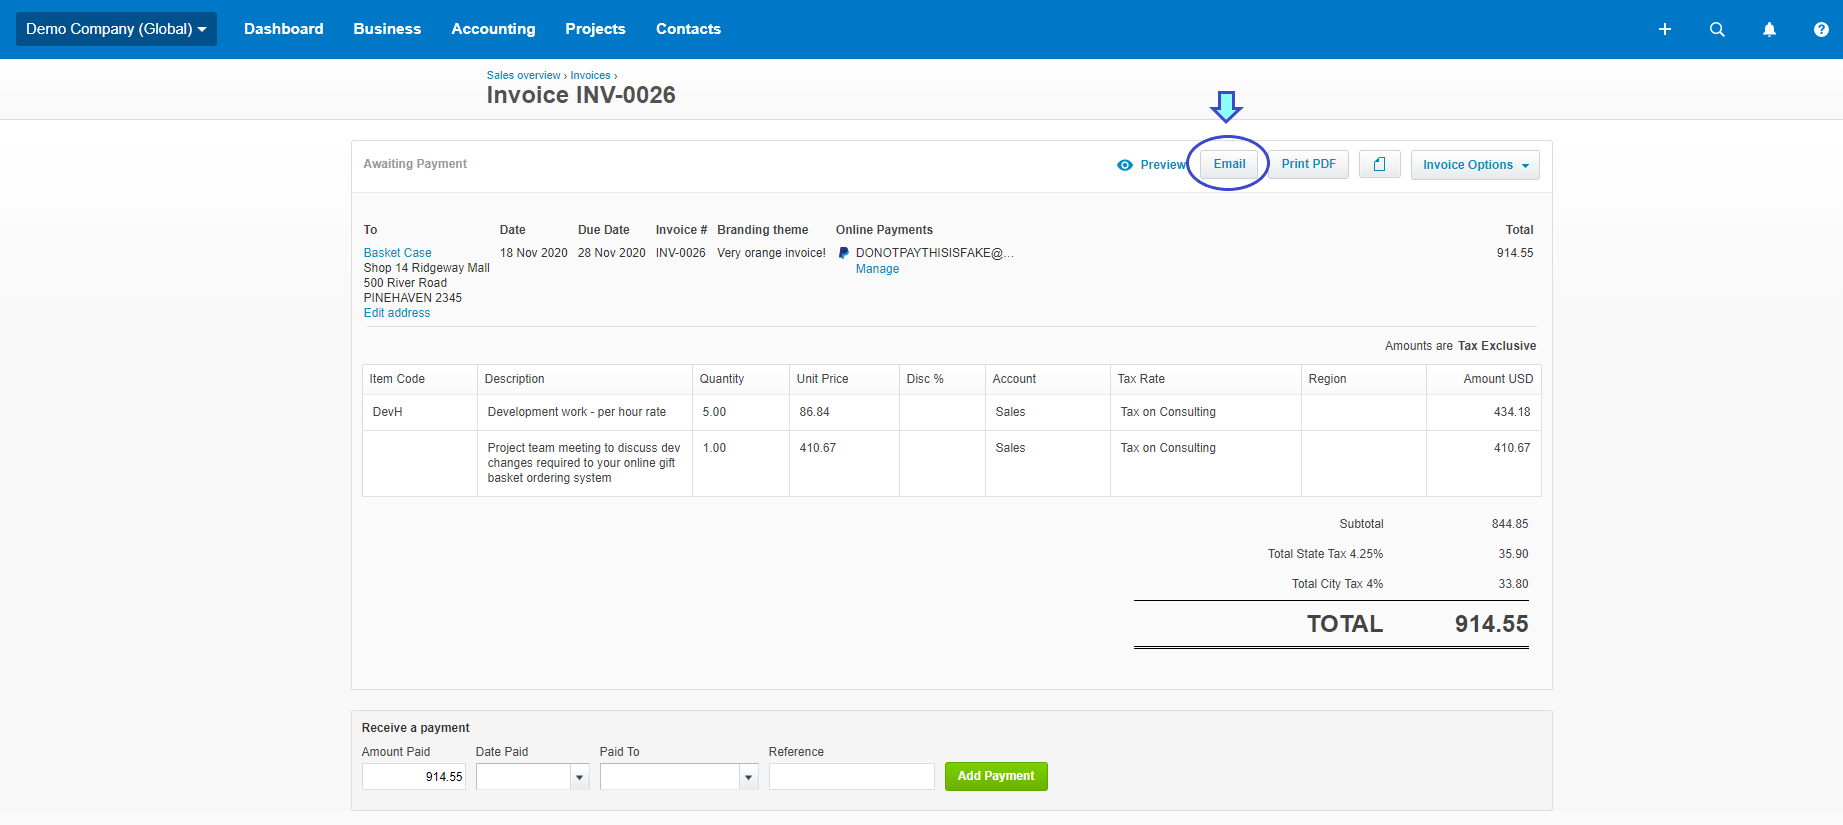
- If you are certain about detail on the invoice, click Approve. The approved invoice will appear in Awaiting Payment. After that you can print or email the invoice to your customer accordingly.
If you have already sent the invoice to your customer, we suggest that you do not void it but rather send a Credit Note for any changes made.
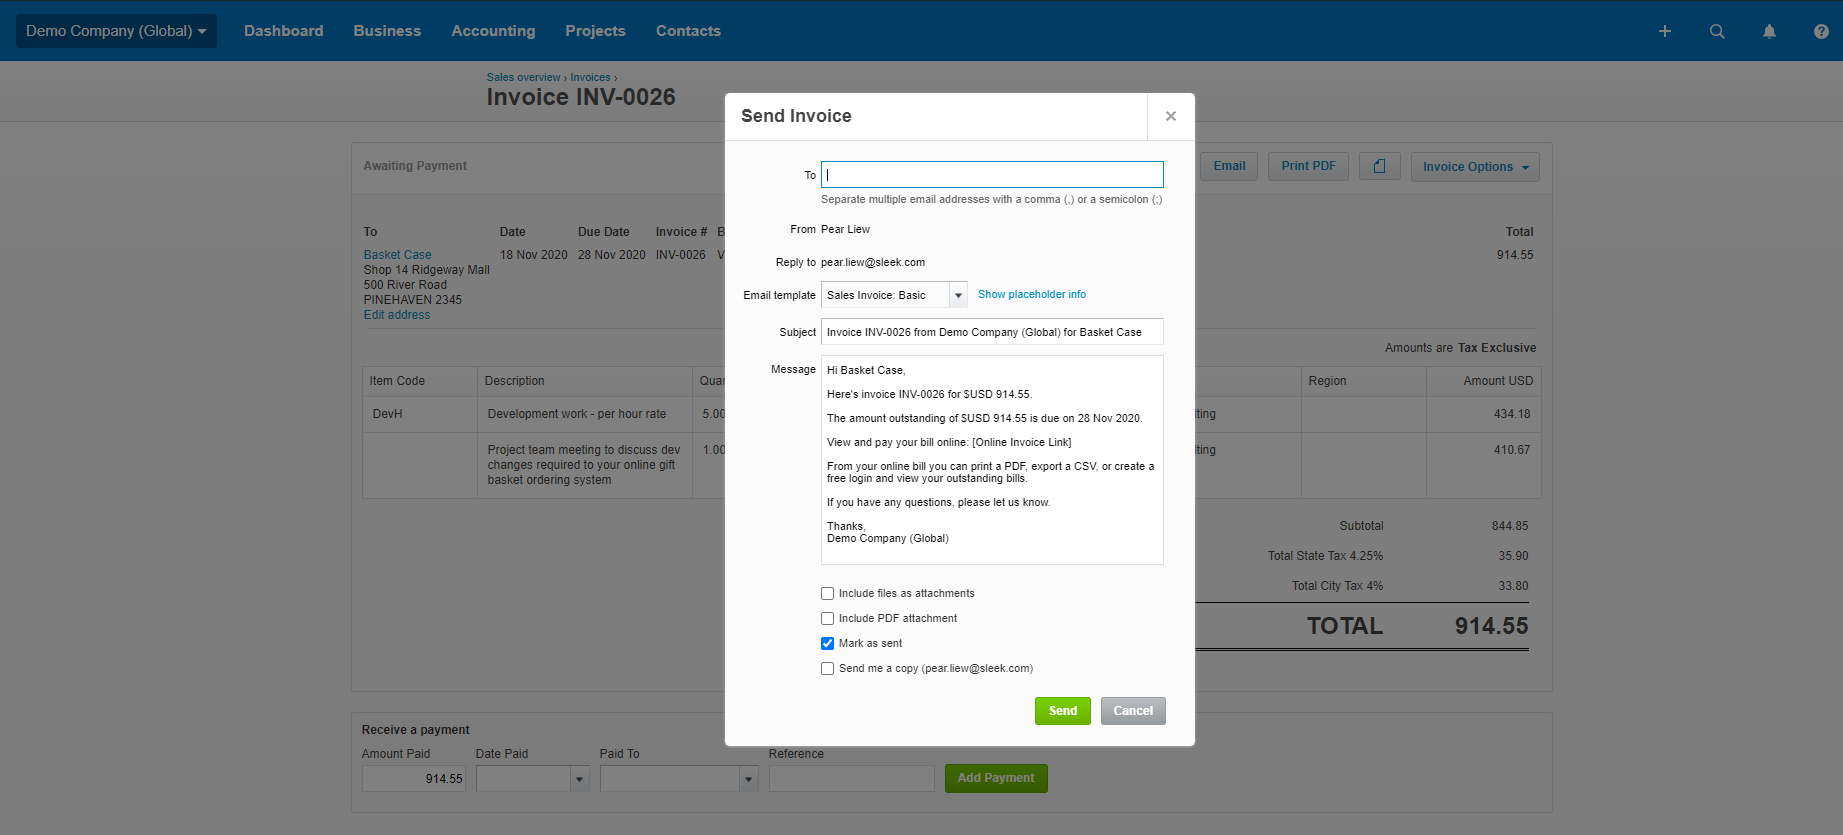
4 - Email the invoice
To email the invoice, just click Email button.
Input sender's email address and check the email message, then hit Send.